If you see lingering bathroom humidity after showers, dark grout or caulk spots, or musty odors for days, your exhaust is probably failing. In coastal San Diego, check for salt-air corrosion, flaking fan housing, and a damper or exterior cap that doesn’t move air well. Test delivered CFM at the grille, aiming for about 80–100; below 70 means restrictions. Use a timer or humidity sensor, pre-run and post-run, targeting ≤60% RH within 30 minutes and ≤50% within 60 minutes, then fix the moisture source first so mold won’t return, and you’ll pick up more practical details next.
Spot Bathroom Humidity That Means Your Exhaust Is Failing
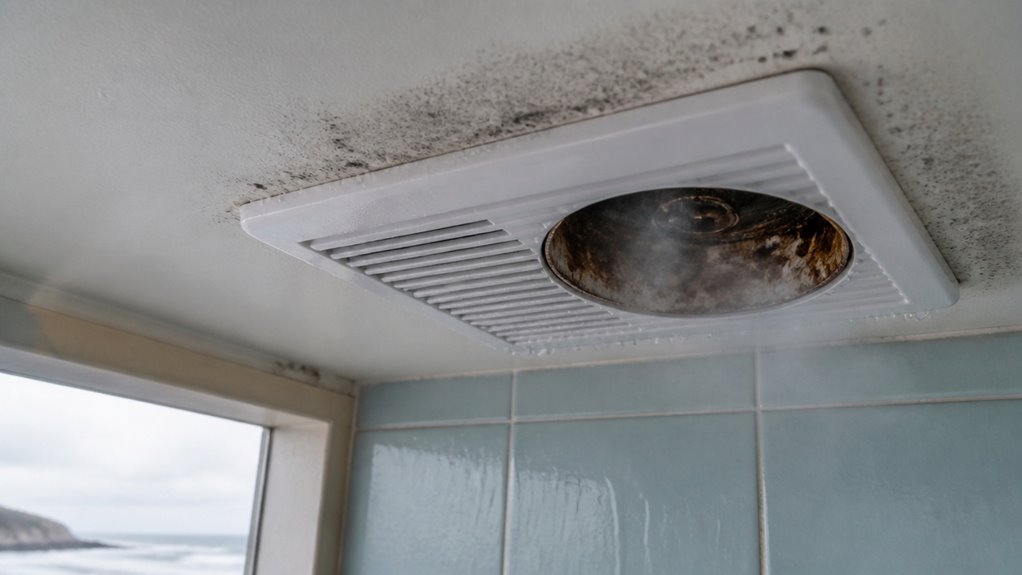
Have you noticed how your bathroom stays humid long after you shower? That lingering moisture is your clue that your exhaust is failing.
You should spot humidity sources by watching for dark spots along grout lines, ceiling corners, and caulk within 24–48 hours. If black or green colonies keep returning despite cleaning, continuous moisture and weak air exchange are likely.
Musty odors that persist for days also point to fungal growth in hidden cavities, especially when RH stays above 60%.
Musty odors lingering for days often signal hidden fungal growth, especially when indoor humidity stays above 60%.
Condensation on mirrors and droplets on tile for hours means saturated air isn’t getting removed, and your target is under 50% RH.
Check your ventilation design too: weak airflow at the grille, fog that won’t clear in 15–30 minutes, or RH above 70% after showers signals inadequate fan CFM.
Check Your Bathroom Exhaust Fan for Salt-Air Corrosion
You should inspect the exhaust fan housing for white/green powder, rust stains, or rough pitting, since coastal salt air speeds up corrosion on metal parts. In addition, verify that the exterior cap and damper open smoothly, look for flaking paint or stiff movement, and make sure seals and fasteners aren’t degraded. If you catch these signs early, you can restore airflow and help prevent overheating or premature motor failure. coastal corrosion
Inspect Fan Housing Corrosion
Salt-air can attack your bathroom exhaust fan from the inside out, so take a close look at the fan housing when you inspect it.
Start your corrosion assessment by searching for rust stains, salt crusts, and flaking paint around the housing, louvers, and mounting points. Use a tap-test to detect weakened, pitted panels that sound dull or thinner.
Check fasteners for rusted or seized hardware, since corroded mounts can let the fan sag and vibrate. Then inspect electrical access areas for corrosion on terminals, which can raise resistance and overheating risk.
Track condensation and microclimates that create crevice corrosion inside ceiling cavities.
For prevention, follow maintenance practices like periodic cleaning and thorough drying, and prioritize durable material selection such as 304/316 stainless or marine-grade aluminum with protective coatings.
Verify Exterior Cap And Damper
After you check the fan housing for corrosion, verify the exterior vent cap and damper too, because that’s where salt spray and UV exposure quietly team up to create long-term draft and moisture problems.
Start by inspecting the exterior cap for perforations, flaking, red/brown or white deposits, cracked plastic, and loose fasteners, then document findings with date-stamped photos. Coastal air can pit aluminum and galvanized steel in as little as 3–7 years, so don’t ignore small spots.
Next, test damper function: run the fan and watch the flap open and close fully, listening for rattles or grinding that suggest seized hinges.
Check seals and flashing for salt-degraded gaps or water staining, and clean salt crystals with a fresh-water rinse before drying thoroughly.
Test Exhaust Airflow: CFM at the Grille (What’s OK)
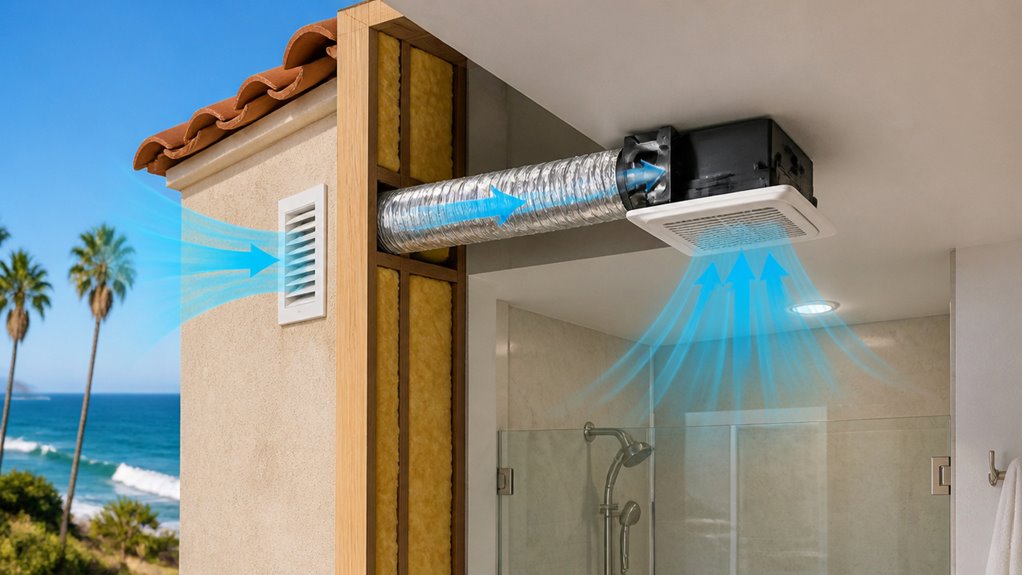
When you test your bathroom exhaust, you’re looking for delivered CFM at the grille, not the fan’s box rating, so you can judge real performance.
In coastal San Diego homes, aim for about 80–100 CFM at the grille, and anything under 70 CFM usually means the system is struggling.
If your CFM lands below 70% of the rated value, you should treat it as restricted airflow and check for clogged ducts, damper issues, or corrosion effects.
Early planning should consider condo and HOA constraints and potential access limitations that may affect exhaust routing and ventilation upgrades. ventilation planning
Target CFM At Grille
To verify bathroom ventilation, you need to know what “CFM at the grille” actually represents, because it’s the real airflow you measure where the air leaves the house.
Then you set a target so your humidity control works, and your ventilation compliance holds. Use these practical goals tied to airflow measurement and exhaust performance:
- Powder rooms: about 25–50 CFM for moisture removal and odors
- Full tub/shower: about 50–80 CFM for consistent humidity control
- Multi-fixture/large rooms: about 80–150 CFM depending on use
- Frequent long showers: target upper range; consider duct sizing upgrades
If grille CFM stays far below fan efficiency, recheck grille installation, duct sizing, and airflow measurement.
If measured CFM misses code-required CFM, you fix duct restrictions, restrictive grilles, and backdraft dampers to protect moisture removal.
Acceptable Performance 80–100
You’re aiming for dependable moisture removal, so the “80–100” performance idea matters because it describes what you should measure at the grille under real operating conditions.
When you test exhaust airflow in CFM at the grille, acceptable performance typically lands around 80–100% of the fan’s expected capacity, helping you confirm ventilation effectiveness. For many bathrooms, you’ll see this show up as about 80–100 CFM on medium spaces, with coastal humidity and air density causing only small shifts.
Keep your duct run smooth, properly sized, and well-sealed so airflow doesn’t leak or get choked by restrictions.
Also, watch noise: many systems deliver these levels around 0.5–2.0 sones, so operation stays tolerable and effective.
Under 70% Indicates Restriction
If your bathroom exhaust grille measures less than 70% of the fan’s expected or rated CFM, it signals meaningful restriction in the ventilation path. You should treat this as a diagnostic trigger, not a minor fluctuation, because poor airflow changes airflow dynamics and can’t safely remove moisture.
Start with a calibrated flow hood or balometer at the grille, matching the intended test conditions, including fan speed, door position, and any backdraft damper. Then compare measured CFM to the fan’s nameplate or design target.
Check likely causes, such as duct design issues, and verify static pressure if possible. Look for:
- Lint or debris blocking ducts
- Too much duct length or crushed flex duct
- Undersized or clogged exterior termination
- Underperforming fan installation or wear
- Closed dampers or blocked grilles
Fix Duct Runs, Bends, and the Exterior Hood/Backdraft Damper
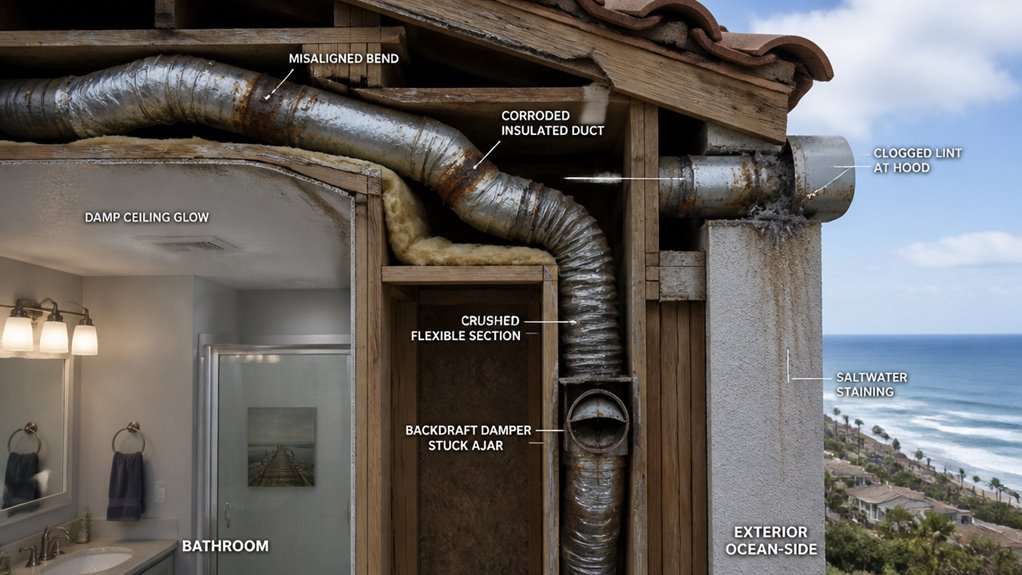
Even when your bathroom fan is sized correctly, duct routing and the exterior exhaust hood can quietly cut performance—especially in coastal San Diego where salt air accelerates corrosion. Keep your duct design simple to improve longevity and efficiency, as coastal moisture and humidity can affect materials over time. Maintain good ventilation by ensuring the backdraft damper opens fully and inspect every 6–12 months, and consider selecting corrosion-resistant components like 316 stainless to withstand salt exposure coastal moisture and ensure durable performance.
Set Timer or Humidity Runtimes (Coastal Moisture Control)
To keep coastal San Diego bathrooms dry without wasting electricity, you should choose either a timer or a humidity-sensing (humidistat) control strategy and program it around how fast moisture builds during showers.
For timers, match runtime to size: small (20–30 minutes), medium (30–45), large (45–60). You can also boost efficiency with a 10–15 minute pre-run, then a 20–45 minute post-run.
For humidistats, set humidity thresholds: trigger at 60% RH, shut off at 50% RH, and use 5–10% hysteresis. Aim for 50% RH or lower after ventilation.
- Prevent mold by targeting 50% RH
- Use timer settings by bathroom size
- Trigger boost at 60% RH
- Shutoff near 50% RH
- Consider longer runtimes if you’ve had mold
Timers cost less upfront; humidistats save energy about 20–40%.
Run Your Bathroom Exhaust Fan With Timer/Humidity Control
Run your bathroom exhaust fan on a timer or a humidity sensor so it removes coastal moisture right when it matters, not hours later. Pair this with corrosion-resistant, sealed fans rated for humid coastal conditions, so the housing and motor last. Choose EC-motor models for better fan efficiency, since they consume less energy while delivering steady airflow. If you can, install an inline or remote-mounted fan to keep the motor farther from salty, wet air, which supports durability. Set short boost periods, then let the fan return to a lower continuous flow for smarter coastal considerations. Humidity control can be integrated with humidistat timers to optimize moisture removal in bathroom spaces.
Hit RH Targets After Showers (Timing + Numbers)
Once you’ve set your fan up with timer or humidity control, the next step is hitting the right RH targets right after the shower, not just turning the system on and hoping. A well-coordinated design-build approach helps ensure the ventilation system aligns with the bathroom layout and materials, especially in coastal San Diego where humidity can persist after showers. Start the fan 2–5 minutes before showering when you can; otherwise, turn it on at shower start and keep it running the entire time. Plan for about 20 minutes minimum, but in coastal San Diego, 30–60 minutes often works better, especially with continuous vapor release (roughly 1–4 liters). Use humidity measurement at ceiling and exterior-wall surfaces, while you verify strong air circulation. – Target bathroom air RH ≤50% (≤60% max) – Aim for ≤60% within 30 minutes – Aim for ≤50% within 60 minutes – Keep surface RH from staying ≥70% – Adjust runtime if your fan is under ~50 cfm continuous ventilation
Repair Ventilation First: Then Address Any Moldy/Damp Materials
Because ventilation problems create the moisture that lets mold grow, you should repair the exhaust system before you tackle any moldy or damp materials. This is the ventilation importance at work: you stop the moisture source first, then you remove what the moisture harmed.
If you only clean surfaces or spray biocides, the damp air returns and mold often comes back within months. In coastal San Diego, salt air can corrode hoods and fans, so start by checking fan airflow, duct clogs, backdrafting, and the exterior termination.
Measure CFM, inspect long or kinked runs, and replace corroded metal. After the ventilation works, let the space dry through several cycles, tracking humidity, before replacing cabinets or drywall. This supports moisture control and reduces warranty issues.
Wrapping It Up
When your bathroom air stays steamy, your fan isn’t just “underperforming,” it’s failing to move coastal moisture out. You spot the signs, inspect for salt-air corrosion, and verify airflow in CFM at the grille. Then you fix duct runs, kinks, and the exterior hood or backdraft damper. Finally, you set smart humidity or timer runtimes and target the RH after showers. Ventilation comes first, mold waits for no one.