You’ll get the most “spa” look, safest entry, and best zero-step access with a well-built curbless roll-in shower, since there’s no raised edge. Still, you must nail waterproofing details and slope, because small errors can cause failures. A low-threshold shower is often easier and cheaper to retrofit, with simpler containment. If you choose wisely, drain type matters too: linear drains help maintain consistent slope. Keep going to compare what fits your home best.
Curbless vs Low-Threshold: Which Fits Your Needs?
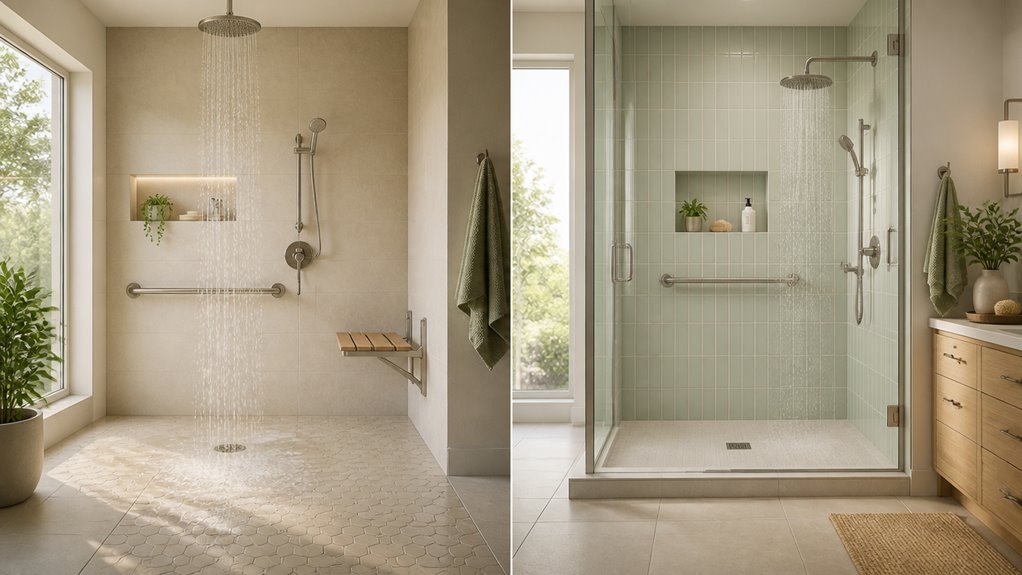
So, which shower design really fits your needs—curbless or low-threshold?
Curbless showers create seamless, spa-like shower aesthetics, and you can keep tile continuity across the whole floor for a minimalist look. A linear drain also boosts visual symmetry, but you must coordinate lighting and slope to avoid uneven-looking surfaces.
Curbless showers offer seamless, spa-like tile continuity and a linear drain for visual symmetry—just ensure lighting and slope stay perfectly coordinated.
You’ll face tougher installation challenges, too, because curbless setups demand precise subfloor engineering, advanced waterproofing, and customized slopes, often raising labor costs by 10–30%.
Low-threshold showers still deliver a clean changeover, yet they’re easier to build with preformed pans or kits. In retrofits, you usually avoid costly regrading or plumbing changes, while water containment stays more forgiving during heavy use.
Accessibility Benefits of a Curbless Roll-In Shower
With a curbless roll-in shower, you get zero-step access, so you can drive your wheelchair straight in and make transfers with less risk of catching a foot or toe. In addition, proper waterproofing remains essential to longevity in coastal environments, and using a linear drain with the right slope helps prevent water pooling on the floor. You’ll also notice easier grab-bar placement and safer caregiver-assisted entry, which together support smoother, more secure daily bathing. Waterproofing importance
Zero-Step Roll-In Access
When you choose a zero-step roll-in shower, you remove the biggest barrier—having to step over a curb—so you can enter the shower with a wheelchair or mobility device more safely and with less effort.
This design supports wheelchair maneuverability by using clear floor space, often around 60 inches by 30 inches or a 60-inch turning circle. It also follows ADA 2010 guidance when you provide appropriate turning radii and floor clearance.
A flush threshold helps prevent snagging for small casters, and any residual bevel should stay under 1/2 inch.
You gain shower safety through integrated grab bars and accessible control heights, typically 33–36 inches above the floor, with 250 lb strength.
You can bathe more independently, with less caregiver time.
Additionally, choosing a curbless or low-threshold design can influence overall bathroom planning, including full bathroom remodel considerations to ensure plumbing and electrical updates are aligned with accessibility goals.
Reduced Trip And Slip Risk
Curbless roll-in showers reduce both trip and slip risk by removing the raised edges that commonly catch feet, walkers, or small wheelchair casters.
In addition, they can be coordinated with complementary storage and furniture-style options to maintain a cohesive bathroom design while preserving accessibility features storage solutions.
Low-Threshold Trip, Slip, and Fall Risk Tradeoffs
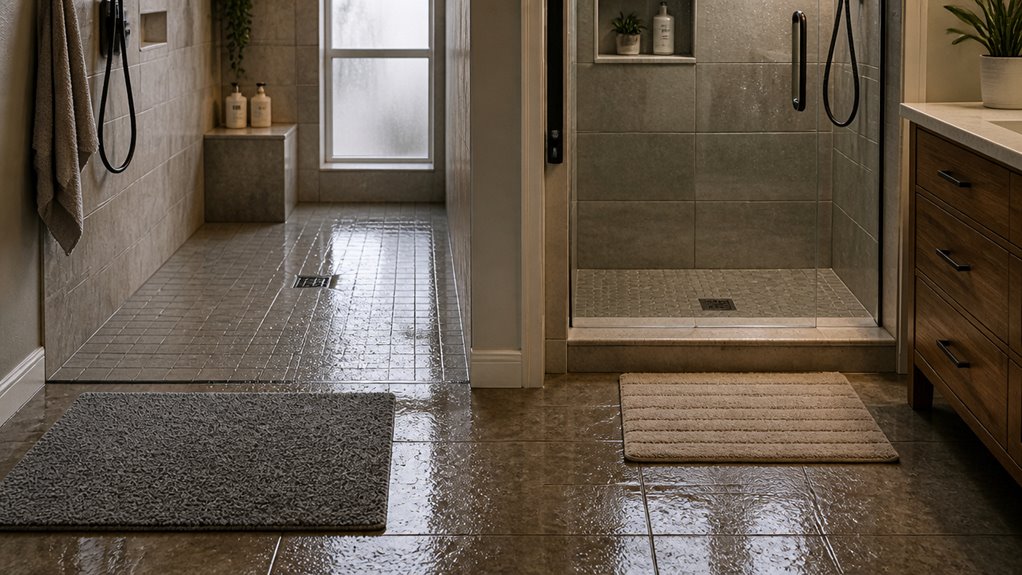
When you choose a low-threshold shower, you trade some trip protection at the edge for better water containment, and the exact step height really matters for preventing stumbles.
You also need to think about wet-edge visibility and contrast—clear, high-contrast edging helps you detect the change sooner, but slippery footwear and poor wet-floor friction can still increase slip risk.
Finally, you should verify slip resistance and floor slope, because standing water and soap film can lower wet COF enough to turn a “small step” into a serious hazard.
Trip Height And Entry Steps
Even a small change in height at the shower entrance can shift your risk profile, because you have to interrupt your normal gait for one brief moment.
With low-threshold trip height—often 2–4 in—you force a step-over, so you add an anterior–posterior disturbance that increases toe catch. If you have mobility challenges, reduced lower-limb control, or you’re carrying items, the margin gets smaller fast, and toe clearance drops with age.
You also slow compensatory steps when your foot trajectory varies, so the same curb can be manageable one day and risky the next.
- Higher trip height demands more hip/knee flexion
- Step-over entry steps disrupt natural cadence
- Variability and distractions shrink clearance margin
From a design-build planning perspective, ensuring thorough coordination of layout, fixtures, and entry configurations can help minimize trip hazards while maintaining accessibility and waterproofing considerations. This underscores the importance of clear scope and material selection from the outset to balance safety and function. Design-build planning
Wet Edge Visibility And Contrast
Because wet floors can look almost the same as dry areas, you may misjudge where the “danger zone” starts. A clear wet edge with strong visual cues improves recognition; studies show older adults miss boundaries far less, by up to 30%.
If flooring materials use uniform color or texture, contrast sensitivity drops, and low-light lighting conditions make the shift late to notice. Glare effects from pooled water can mask the boundary, especially on glossy finishes, while matte surfaces help.
You also raise cognitive load when you multitask, so you miss subtle drainage visibility and grout-line cues. Raised trim, identifiable thresholds, or contrasting accent strips define geometry, reducing missteps during change.
In contrast, flush profiles and busy tile patterns blur the wet edge, even as lighting shifts with daylight.
A clear design strategy should also consider how waterproofing details influence the risk of slips and falls by ensuring consistent edge definitions throughout the transition from dry to wet areas.
Slip Resistance And Floor Slope
Slip risk and drainage design work against each other in curbless and low-threshold showers, so you have to balance traction and slope to reduce both slips and trips.
You should verify slip testing results (ASTM D2047, ANSI A137.1/A326.3 DCOF, or BS 7976 pendulum PTV) because surface finish, soap, and water can change real-world performance.
At the same time, you must hit drainage strategies like ~2% slope, avoiding <1/8" per foot ponding, and excess slope that increases threshold tripping.
Use thoughtful material selection and surface treatments, such as matte or textured tiles, and remember that anti-slip additives may raise maintenance frequency.
For safe planning, follow accessibility standards and create smooth grade changes.
- Match DCOF/PTV targets to wet conditions
- Choose linear drains for flatter, consistent slope
- Plan cleaning to protect traction over time
Waterproofing Rules That Make Curbless Easier to Fail
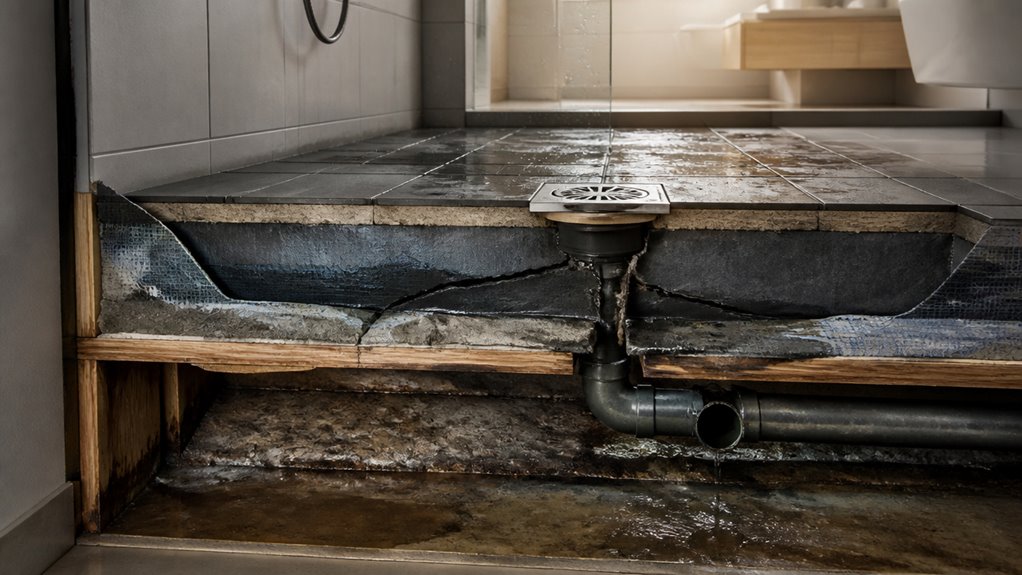
When you go curbless, waterproofing failure usually starts with the slope and gradients you can’t ignore, and that’s where many installs go wrong.
You face waterproofing challenges when slope management misses the typical 1/4″ per foot (about 2%) toward the drain, or when fixed finished flooring blocks your ability to hit that angle.
Large, open layouts may need multiple or linear drains to keep consistent slope.
Then the membrane details decide whether water escapes. Pick the right membrane and seal seams, coves, and junctions with reinforcement, because omissions here are common failure points.
You must protect membrane edges at open thresholds, integrate the shower plane into adjacent floors, and never skip flood testing.
Finally, handle drain penetrations carefully to prevent hidden leaks.
Curbless Cost Reality vs Low-Threshold Alternatives
Even though you get a clean, flush look with a curbless shower, the cost story isn’t as simple as “tile is expensive.” In most remodels, curbless installations run about 10–30% higher than standard curbed showers because you pay for custom slope building, careful drain work, and often extra framing or lowering adjacent floors by 1–2 inches.
Meanwhile, low-threshold advantages shine in budgets: a 1/2″–2″ pan or preformed base typically adds minimal labor and materials.
- Curbless pricing often includes $300–$1,200 linear drain parts
- Low-threshold kits and round/center drains can run about $50–$400
- Curbless waterproofing repairs can cost thousands if leaks develop
Linear vs Center Drains: How They Handle Water
After you’ve weighed the real-world costs of curbless versus low-threshold options, the next detail that shapes performance is the drain layout.
If you choose a linear drain, you’ll usually get stronger drain efficiency and higher flow capacity because its long intake captures water along one edge. You also benefit from simpler slope considerations: a single-plane slope guides water straight to the channel, which improves debris management with easier grate access.
For center drains, water moves radially in a pyramid pattern, so you must nail multi-directional slope considerations to prevent pooling. That makes installation ease more demanding, and waterproofing techniques require careful planning around the flange to handle overflow resilience and clog risk.
Tile and Grout Choices for Safe, Easy Cleaning
Tile and grout choices directly control how safe your shower stays and how easily you can keep it looking clean.
Pick porcelain for tile durability because it absorbs less than 0.5% of water, resists staining, and handles freeze-thaw. For safety, prioritize slip resistance with matte or textured finishes, and consider mosaics that add traction through grout joints.
Then plan grout maintenance: epoxy grout resists water and stains but costs more and needs careful installation, while cementitious grouts may need sealing and can stain.
- Choose porcelain or well-glazed ceramic for lower staining risk
- Match grout type to joint width and sealing needs
- Use textured finishes to boost traction and reduce slip
Also, adjust cleaning frequency for hard-water scaling and residue buildup.
Curbless Code, Permits, and Warranty Checklist
Before you order materials or demo your old shower, you need to confirm that your curbless (or low-threshold) plan meets local code, accessibility rules, and warranty requirements.
Start with the code requirements in the IRC/IBC and your jurisdiction’s amendments, especially threshold limits, slip-resistance, and drainage slope.
Next, follow the permit process: submit floor plans, plumbing details, and waterproofing documentation, and expect inspections with water tests. If the work involves structural changes or plumbing relocation, plan for 1–6+ weeks for review.
Finally, protect your warranty coverage. Keep product specs, installer documentation, and proof of approved installation guidelines.
Verify manufacturer terms for waterproofing membranes and drains, plus your contractor’s labor warranty, and avoid exclusions from improper installation or unapproved modifications.
When Low-Threshold Wins in Existing Home Retrofits
When you’re retrofitting an older home, low-threshold showers often make the most sense because they solve practical problems that “true” curbless builds frequently create.
First, you’ll face retrofit challenges like joist depth limits, limited slope tolerance, and deflection concerns, so a standard tile-and-drain curbless setup may require extra subfloor buildup or floor-to-ceiling compromise. Low-threshold kits use integrated pans or bases with lower dead loads and less sensitivity to minor movement.
Second, you’ll reduce water risk, since a small curb or sill limits horizontal splash spread if membranes fail.
Third, installation time typically drops, because you’ll avoid heavy demolition, saw-cutting, and long mortar curing.
- Minimizes floor-structure conflicts
- Lowers leakage migration across rooms
- Reduces installation time and disruption
Wrapping It Up
You’ll choose a curbless shower if you prioritize full roll-in access, safer changes, and a smoother cleaning routine. You’ll choose a low-threshold shower when you need a practical middle ground for existing homes, faster installation, or limited floor removal. Either way, you’ll win with solid waterproofing, the right drain layout, and code-ready planning. Compare costs, consider fall-risk tradeoffs, and pick the design that supports your daily use, not just your wish list.